Creating a GitHub Copilot Plugin
A practical guide to creating and sharing GitHub Copilot plugins that bundle agents, skills, hooks, MCP servers, and other customizations
Overview
Tiago Pascoal and I recently finished a Microsoft Build lab, LAB502: Make GitHub Copilot Work Your Way: Custom Tools, Context and Workflows. The lab walks through a lot of the newer Copilot customization surface: instructions, prompt files, skills, custom agents, hooks, MCP servers, and plugins.
The plugin part is what I wanted to pull out into its own post. A lot of teams start by creating a copilot-instructions.md file, then maybe a custom agent or a skill. That works great when the customization lives in one repo. But once you want to share a curated set of customizations across machines, repos, workshops, or teams, a plugin becomes the more natural packaging model.
I’ll walk through what a plugin actually is, why we packaged the LAB502 customizations as one, and how marketplaces help you share plugins beyond your own machine.
GitHub Copilot plugins are moving quickly. The examples below are based on the current GitHub Copilot CLI plugin model and the Build lab repo. If the command syntax changes, run
copilot plugin --helpor/helpin an interactive Copilot CLI session for the latest options.
What Is a Copilot Plugin?
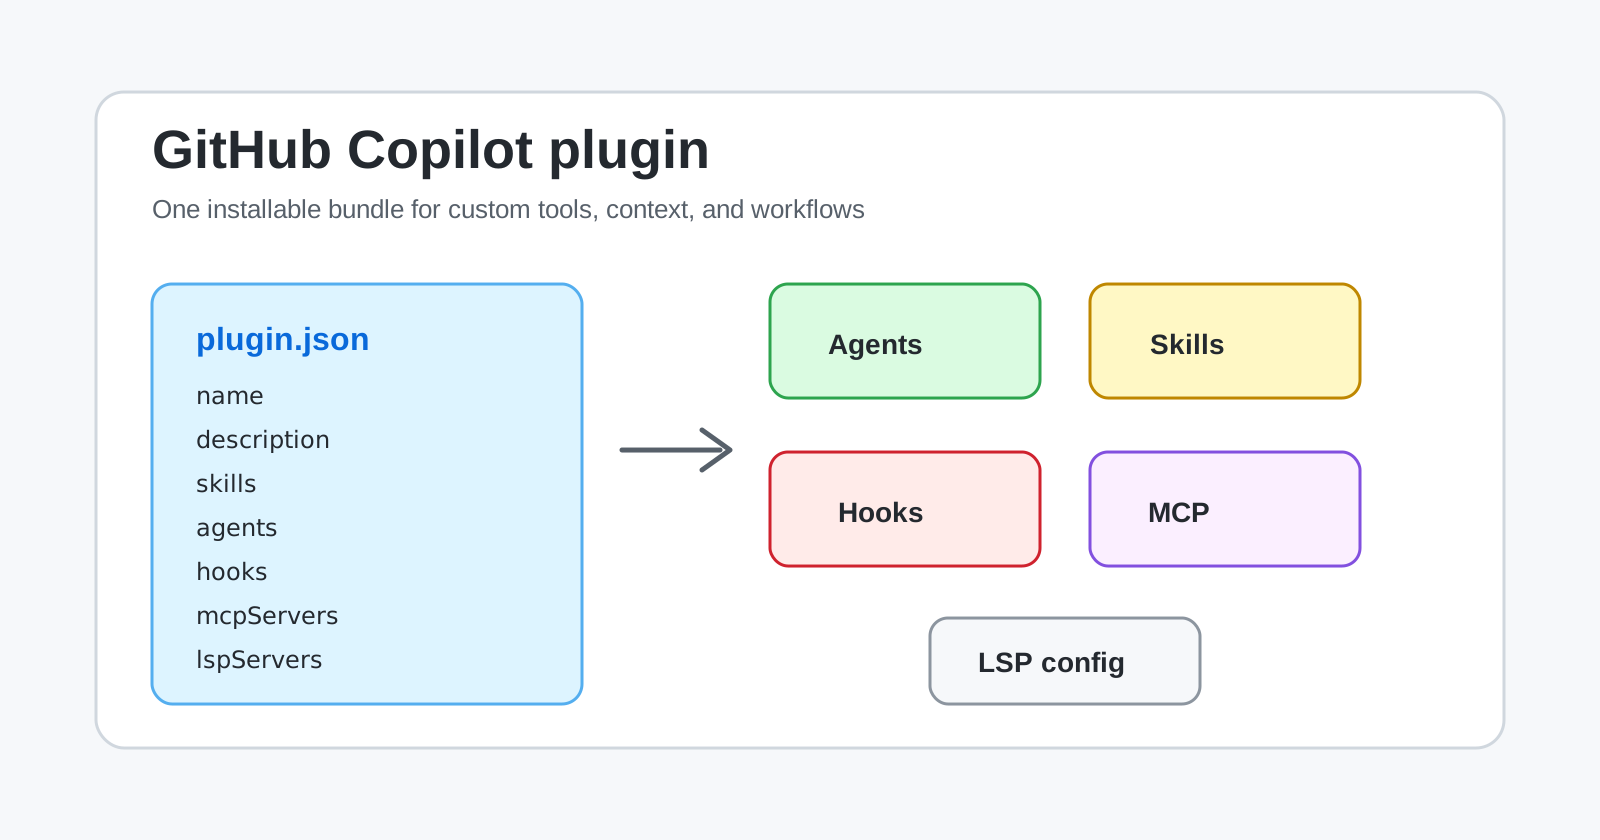
A GitHub Copilot plugin is an installable package for GitHub Copilot CLI customizations. At minimum, it has a plugin.json manifest. From there, it can bundle one or more of these components:
| Component | What it is good for | Example from the Build lab |
|---|---|---|
| Skills | Reusable task-level workflows that Copilot can discover from the skill description | Uploading a screenshot to the Community Hub |
| Custom agents | Specialized personas with their own instructions, tools, and MCP server configuration | Capturing a web page screenshot with Playwright |
| Hooks | Deterministic actions that run on Copilot lifecycle events | Reporting session start, prompt submitted, tool used, and agent stop events |
| MCP servers | External tool gateways for APIs, databases, internal systems, or browser automation | Playwright MCP used by the screenshot agent |
| LSP servers | Language intelligence for specific file types | HTML language server support for .html and .htm files |
| Scripts and assets | Implementation files used by skills, hooks, agents, or tools | Bash and PowerShell scripts for cross-platform lab environments |
A plugin is not a new customization type to learn. Your skills, hooks, and MCP config stay exactly what they were. The plugin is just the wrapper that lets someone install the whole setup in one command.
The Build Lab Example
In the Build lab, we created a plugin called space-invaders-makers. The lab itself has attendees build a small Space Invaders-style browser game with Copilot, then share screenshots and game artifacts with a Community Hub.
The plugin connects the Copilot experience to that Community Hub:
- It records Copilot activity through hooks, including session starts, prompts, tool usage, agent stops, and subagent stops
- It provides a
share-screenshotskill that uploads an image file to the hub - It provides a
web-screenshottercustom agent that uses Playwright MCP to capture a web page screenshot and then share it - It includes Bash and PowerShell scripts so it works across macOS, Linux, and Windows lab machines
- It includes an HTML language server configuration for browser-game files
The plugin is in the lab repo under src/plugins/space-invaders-makers/. The shape looks like this:
1
2
3
4
5
6
7
8
9
10
11
12
13
14
15
16
17
space-invaders-makers/
├── plugin.json
├── agents/
│   └── web-screenshotter.agent.md
├── hooks/
│   └── hooks.json
├── scripts/
│   ├── agent-stop.sh / agent-stop.ps1
│   ├── session-start.sh / session-start.ps1
│   ├── subagent-stop.sh / subagent-stop.ps1
│   ├── tool-used.sh / tool-used.ps1
│   └── user-prompt-submitted.sh / user-prompt-submitted.ps1
└── skills/
    └── share-screenshot/
        ├── SKILL.md
        └── scripts/
            └── share-screenshot.sh / share-screenshot.ps1
I like that a plugin does not need to be one giant thing. It can be a thin manifest plus the same kinds of small files you would have written anyway.
Creating the Plugin Manifest
The plugin.json file tells Copilot what the plugin is and where its components live.
Here is a simplified version of the Build lab plugin manifest shape:
1
2
3
4
5
6
7
8
9
10
11
12
13
14
15
16
17
18
19
20
21
22
23
{
  "name": "space-invaders-makers",
  "description": "Tracks lab activity with hooks and helps users capture and share web screenshots through the Community Hub",
  "version": "1.0.0",
  "author": {
    "name": "Build 2026 Lab"
  },
  "skills": [
    "skills/share-screenshot"
  ],
  "agents": "agents/",
  "hooks": "hooks/hooks.json",
  "lspServers": {
    "html": {
      "command": "vscode-html-language-server",
      "args": ["--stdio"],
      "fileExtensions": {
        ".html": "html",
        ".htm": "html"
      }
    }
  }
}
You technically only need a name, but I would still add a description, version, and author. It makes the plugin much easier to understand when someone browses or installs it.
Here’s what the main manifest fields do:
| Field | Purpose |
|---|---|
name | Kebab-case plugin name |
description | Short description shown when browsing or listing plugins |
version | Semantic version of the plugin |
author | Plugin author metadata |
agents | Path or paths to directories containing .agent.md files |
skills | Path or paths to skill directories containing SKILL.md files |
hooks | Path to a hook configuration file, or inline hook configuration |
mcpServers | Path to MCP config, or inline MCP server definitions |
lspServers | Path to LSP config, or inline LSP server definitions |
You do not have to write this file from memory. Two things make it much easier:
- Add a
$schemafield pointing at the Open Plugin Spec v1.0.0 schema (grab the canonical URL from the plugin reference). Once it is there, VS Code’s built-in JSON support gives you autocomplete, hover descriptions, and inline validation as you type, so you pick fields from a dropdown instead of memorizing them. - Let Copilot scaffold it. This is a Copilot feature, so the fastest path is to ask Copilot CLI or Copilot in VS Code to stub out the plugin folder,
plugin.json, an agent, and a skill, then adjust from there.
For the full list of manifest fields, see the GitHub Copilot CLI plugin reference. For a step-by-step walkthrough, see Creating a plugin for GitHub Copilot CLI.
Adding a Skill
Skills are useful when you want Copilot to have a reusable workflow that can include instructions, scripts, references, and supporting assets. In the lab plugin, the share-screenshot skill uploads a local image file to the Community Hub.
The skill starts with a SKILL.md file. The description matters because Copilot uses it to decide when the skill is relevant.
1
2
3
4
5
6
7
8
9
10
---
name: share-screenshot
description: Use this only when a user explicitly asks to upload or share a screenshot image file to the Community Hub. Resolve the image path before uploading.
argument-hint: Absolute path to the screenshot file to share
---

# Share Screenshot

Upload the provided screenshot file to the Community Hub.
Use the bundled script for the current platform and report the uploaded URL back to the user.
The script can live next to the skill, for example under skills/share-screenshot/scripts/. That keeps the skill portable because the instructions and implementation travel together.
Adding a Custom Agent
The lab also has a web-screenshotter agent. This agent is designed for one job: capture screenshots from web pages, then share them through the skill.
The important design choice is that the agent owns the full workflow. The user does not need to remember the sequence of “open the page, capture the screenshot, find the file, upload the file.” They can ask for the outcome, and the agent can use the plugin-provided pieces to get there.
Here is the kind of frontmatter an agent like that uses:
1
2
3
4
5
6
7
8
9
---
name: web-screenshotter
description: Use this agent when a user asks to capture and share screenshots from one or more web pages.
tools: ['execute', 'playwright/*']
mcp-servers:
  playwright:
    command: npx
    args: ['-y', '@playwright/mcp@latest']
---
I would use the same pattern for other internal workflows: give the agent a narrow job, hand it the tools it needs, and let the plugin provide the scripts or skills it calls.
Adding Hooks
Hooks are for behavior you want to happen reliably around Copilot activity. Unlike a skill or agent, a hook does not rely on the model deciding to use it. It runs on lifecycle events.
In the Build lab plugin, hooks report activity back to the Community Hub. The hook configuration maps lifecycle events to platform-specific scripts. The event names are the PascalCase keys, such as SessionStart, UserPromptSubmit, and PostToolUse.
1
2
3
4
5
6
7
8
9
10
11
12
13
14
15
16
17
18
19
20
21
22
23
24
25
26
{
  "version": 1,
  "hooks": {
    "SessionStart": [
      {
        "type": "command",
        "bash": "./scripts/session-start.sh",
        "powershell": "./scripts/session-start.ps1"
      }
    ],
    "UserPromptSubmit": [
      {
        "type": "command",
        "bash": "./scripts/user-prompt-submitted.sh",
        "powershell": "./scripts/user-prompt-submitted.ps1"
      }
    ],
    "PostToolUse": [
      {
        "type": "command",
        "bash": "./scripts/tool-used.sh",
        "powershell": "./scripts/tool-used.ps1"
      }
    ]
  }
}
This is useful for more than lab telemetry. In a real setup, hooks are a good fit for audit logging, security gates, setting up the environment, or seeding context before the agent starts.
Hooks and bundled scripts run on the user’s machine with the user’s permissions. Review plugin code before installing it, especially
SKILL.md,.agent.md, hook configuration, and any scripts called by those files.
Testing a Plugin Locally
You can install a plugin directly from a local path while you are developing it:
1
2
copilot plugin install ./space-invaders-makers
copilot plugin list
Inside an interactive Copilot CLI session, you can verify installed components with commands like:
1
2
3
/plugin list
/agent
/skills list
The two forms are equivalent: copilot plugin ... commands run in your regular shell, while the /plugin ... slash commands run inside an interactive Copilot CLI session. Use whichever matches where you are.
One thing to remember: installed plugin components are cached. If you edit a local plugin after installing it, reinstall the plugin so Copilot picks up your changes.
1
copilot plugin install ./space-invaders-makers
Publishing Through a Plugin Marketplace
This is the part that confused me at first: a Copilot plugin marketplace is not the same thing as GitHub Marketplace for GitHub Apps, and it is not the VS Code Marketplace. In this context, a marketplace is a registry of Copilot CLI plugins. That registry can live in a GitHub repository.
GitHub Copilot CLI includes default marketplaces, currently copilot-plugins and awesome-copilot. You can also add another marketplace by pointing Copilot CLI at a GitHub repository, another Git URL, or a local path.
In the Build lab, attendees add the lab repo as a marketplace:
1
/plugin marketplace add microsoft/Build26-LAB502-make-github-copilot-work-your-way-custom-tools-context-and-workflows
Then they browse and install the plugin from that marketplace:
1
2
3
/plugin marketplace browse community-hub
/plugin install space-invaders-makers@community-hub
/plugin list
The marketplace itself is described with a marketplace.json file. GitHub Docs recommends placing it under .github/plugin/marketplace.json in the repository.
Here is a minimal marketplace entry:
1
2
3
4
5
6
7
8
9
10
11
12
13
14
{
  "name": "community-hub",
  "owner": {
    "name": "Build 2026 Lab"
  },
  "plugins": [
    {
      "name": "space-invaders-makers",
      "description": "Tracks lab activity and helps users capture and share screenshots",
      "version": "1.0.0",
      "source": "./src/plugins/space-invaders-makers"
    }
  ]
}
You can add more marketplace and plugin metadata, but this is the basic shape: name the marketplace, identify the owner, and list the plugins with their source paths.
The
.github/plugin/here is just a directory inside a regular repository. It is not the special organization-level.githubor.github-privaterepository, and the marketplace does not have to live in either of those. Any repo works, and a dedicated repo is common, for example github/copilot-plugins keeps itsmarketplace.jsonat.github/plugin/marketplace.json. Copilot CLI treats the repo as a marketplace as soon as it finds that file (it also checks.plugin/, and.claude-plugin/for Claude Code compatibility).
One thing worth setting expectations on: self-service marketplace browsing with copilot plugin marketplace add and browse is a Copilot CLI flow, and simply adding a marketplace.json to a repo does not create a browsable plugin catalog in the VS Code UI. There are really two ways plugins reach users: they install them by hand with the CLI, or an enterprise pushes them centrally. Enterprise plugin standards let an admin define known marketplaces and default-enabled plugins that apply to users across supported clients when they authenticate. More on that below.
Once that marketplace file exists in a repo, users can add the repo and install the plugin by name:
1
2
3
copilot plugin marketplace add OWNER/REPO
copilot plugin marketplace browse MARKETPLACE-NAME
copilot plugin install PLUGIN-NAME@MARKETPLACE-NAME
You can also install directly without a marketplace:
1
2
3
copilot plugin install OWNER/REPO
copilot plugin install OWNER/REPO:PATH/TO/PLUGIN
copilot plugin install ./local-plugin-folder
For a team, I like the marketplace approach because it gives people a discoverable catalog instead of making them remember repo paths. It also gives you a natural place to describe supported plugins, ownership, versions, and installation instructions.
Where Enterprise Plugin Standards Fit
There is a separate but related GitHub admin feature called enterprise plugin standards. This is the piece that answers “how do I get plugins in front of my whole org without everyone running install commands.” I covered where these governance settings can live in my post on .github and .github-private repositories.
The mechanism is a managed-settings.json file, which an enterprise can source from a designated .github-private repository. For plugins, it supports three keys:
| Key | What it does |
|---|---|
extraKnownMarketplaces | Adds marketplaces users can browse and install from |
enabledPlugins | Auto-installs (or blocks) specific plugins, keyed as PLUGIN-NAME@MARKETPLACE-NAME |
strictKnownMarketplaces | Restricts installs to only the marketplaces the enterprise lists |
When a user authenticates in a supported client, the client reads managed-settings.json and applies these policies to the session. So this is the path where a default-enabled plugin can show up for a user without them adding a marketplace first. All three plugin keys are supported in Copilot CLI, VS Code, and the GitHub Copilot app, per the enterprise managed settings reference.
This is also the only way plugins reach VS Code. There is no self-service plugin install in the VS Code UI, so a plugin only lands in VS Code when an enterprise pushes it through managed-settings.json. Self-service installs (copilot plugin install and marketplace add) stay on the CLI side.
So if you are building a plugin for yourself or a workshop, start with the plugin and optionally a marketplace. If you are rolling this out across an enterprise, use managed-settings.json in your .github-private governance repo to publish the marketplaces and default plugins centrally.
A Practical Creation Checklist
When creating your own plugin, I would start with this checklist:
- Pick a workflow that has multiple pieces and is worth sharing as a unit.
- Create a plugin folder with
plugin.jsonat the root. - Add one component at a time: a skill, an agent, hooks, MCP config, or LSP config.
- Keep scripts close to the component that uses them.
- Test with
copilot plugin install ./your-plugin. - Reinstall after local changes because plugin content is cached.
- Review the installed behavior in Copilot CLI with
/plugin list,/agent, and/skills list. - Add a
marketplace.jsonwhen you are ready to share the plugin with others. - Document environment variables, required tools, and security considerations.
For the Build lab, the workflow was “help attendees build, capture, and share browser games while reporting activity to a Community Hub.” For an internal platform team, it might be “open a production incident workspace,” “generate a service migration plan,” “validate repository compliance,” or “package our deployment review workflow.”
Summary
Copilot plugins are the packaging layer for Copilot customizations. They let you take agents, skills, hooks, MCP server configuration, LSP configuration, scripts, and supporting files and ship them as a single installable unit.
The Build lab plugin is a good example because it does something concrete: it connects Copilot activity to a Community Hub, adds a screenshot-sharing workflow, and gives users a specialized agent that can complete the capture-and-upload flow. That is where plugins earn their keep, as a small collection of customizations that work better together than any one of them would on its own.
The mental model I keep coming back to:
- Use instructions for always-on repo context
- Use skills for reusable task workflows
- Use custom agents for specialized roles with specific tools
- Use hooks for deterministic behavior around Copilot activity
- Use MCP for external systems and tools
- Use plugins when you want to distribute those pieces together
- Use marketplaces when you want other people to discover and install them easily
That gives you a path from a one-repo customization to a shareable team or workshop experience without turning the whole thing into a custom extension or app.