Working Azure DevOps Pipeline Caching for Angular CI
I share how I finally got the Pipeline Cache task to work with my Angular build pipeline
Overview
I’ve tried several times to implement the Pipeline Cache task using Microsoft’s documentation, but have failed every time. I seemed to configure everything like the documentation indicates for my Node.js/npm (Angular) build, but the results are very inconclusive - I didn’t really be saving any CI time.
For builds where the npm install takes 30-60 seconds…it’s not really a problem. However, recently I was working with a team where the npm install was taking 10 (!!!) minutes. This was not going to work for me, and for my sanity, I had to get this pipeline caching figured out.
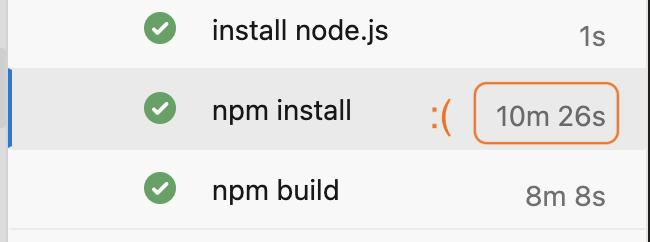 npm install taking 10 minutes to run
How To - The Explanation
I was finally able to figure out what I was missing, part in thanks to this post - in particular, their screenshot:
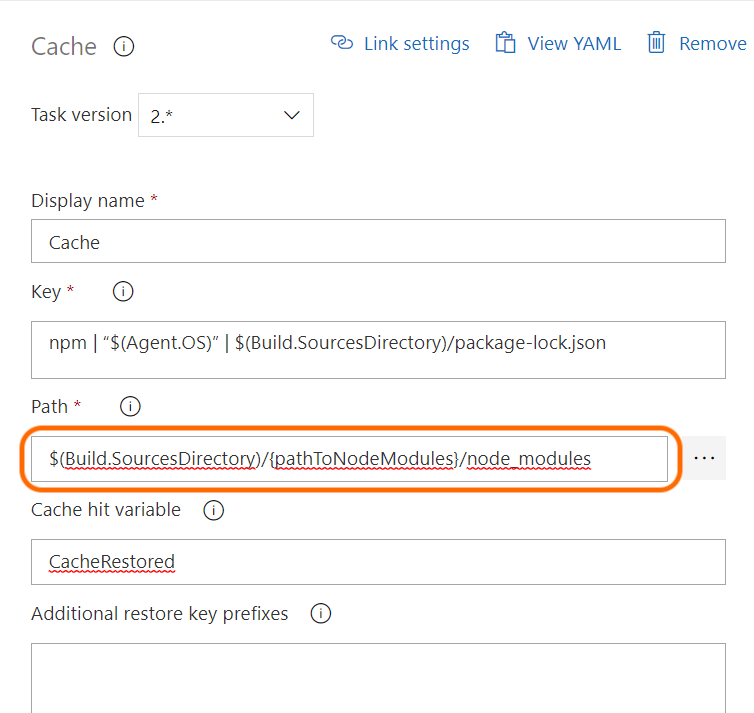 Cache task configuration in a Classic Build Definition
Note how this differs from Microsoft’s documentation:
1
2
3
4
5
6
7
8
9
10
11
variables:
  npm_config_cache: $(Pipeline.Workspace)/.npm

steps:
- task: Cache@2
  inputs:
    key: 'npm | "$(Agent.OS)" | package-lock.json'
    restoreKeys: |
       npm | "$(Agent.OS)"
    path: $(npm_config_cache)
  displayName: Cache npm
Notice how the first screenshot is caching the $(Build.SourcesDirectory)/Project/node_modules folder vs Microsoft’s code sample is caching $(Pipeline.Workspace)/.npm - quite a critical difference! It makes sense after thinking about it, when you run npm install locally, where is it going to download all of the modules to? The node_modules folder in the root of the project, of course.
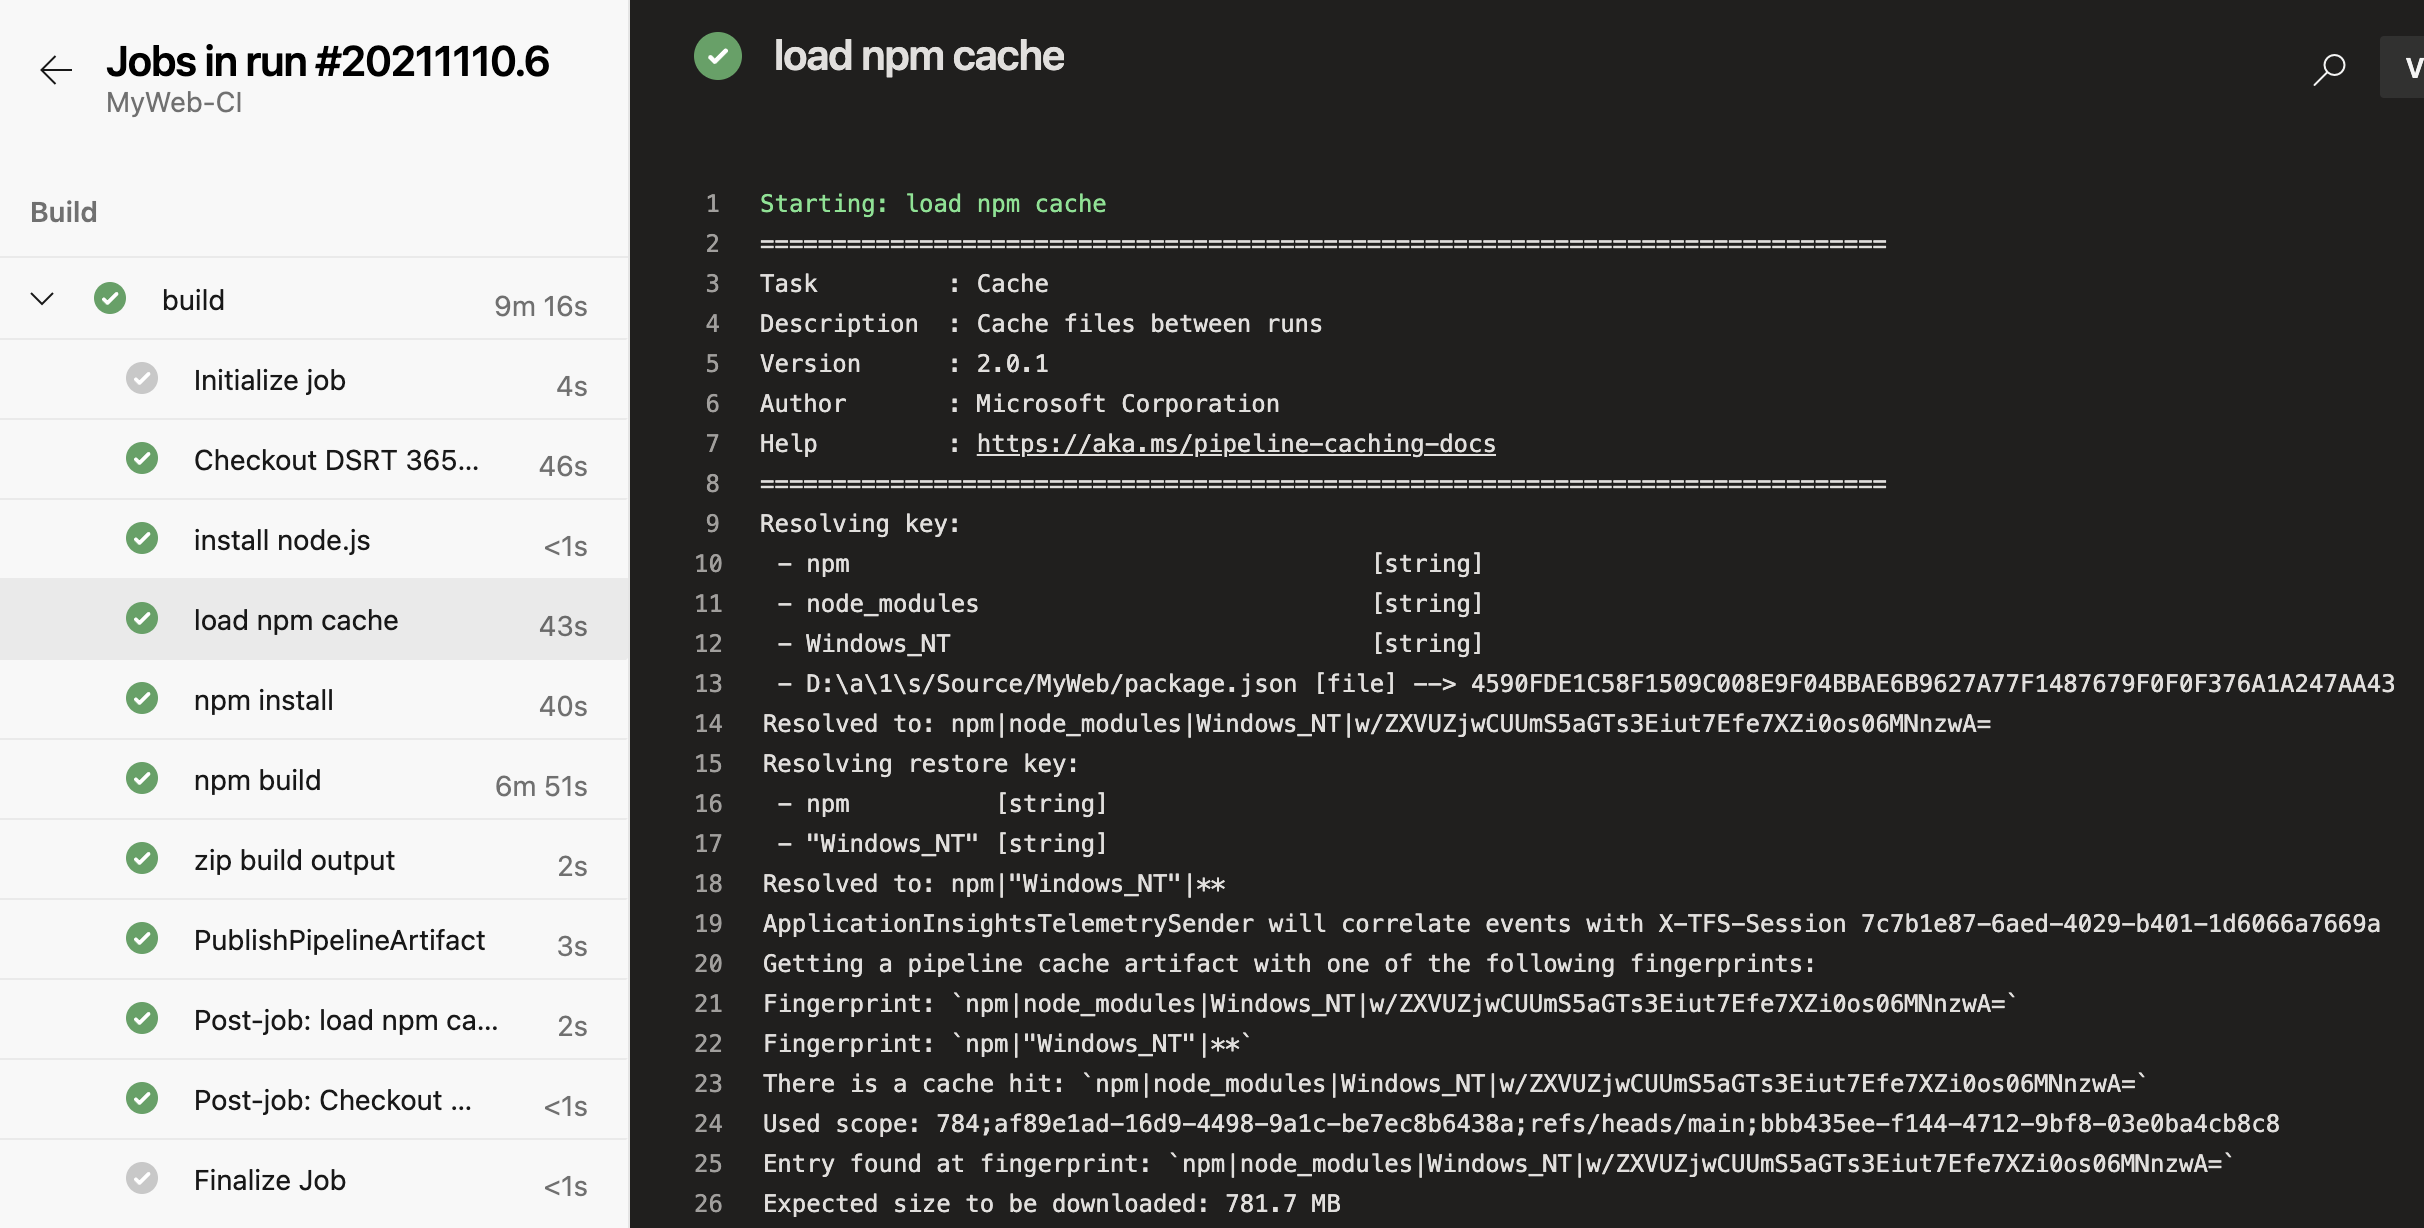
The way the task works is it zips up and saves the path you specify and stores it to the build (as a build-in post-build step). During the next build, if the key matches, it downloads the zip and extracts it to the aforementioned path. Both of the above examples use the key: npm | “$(Agent.OS)” | $(Build.SourcesDirectory)/Project/package-lock.json, where it matches the OS the build is running on as well as the hashed content of the package-lock.json file.
This means, that if you flip a build from Windows to Ubuntu, the key won’t match, and the contents of the cache won’t be restored. Likewise, if the hash of the package-lock.json file changes (ie: you add a package, change a package version, remove a package, etc.), the cache won’t be restored. In both cases, you would expect a full npm install from scratch. If the build completes successfully, you should expect a new cache to be uploaded as an automatically added post build step: 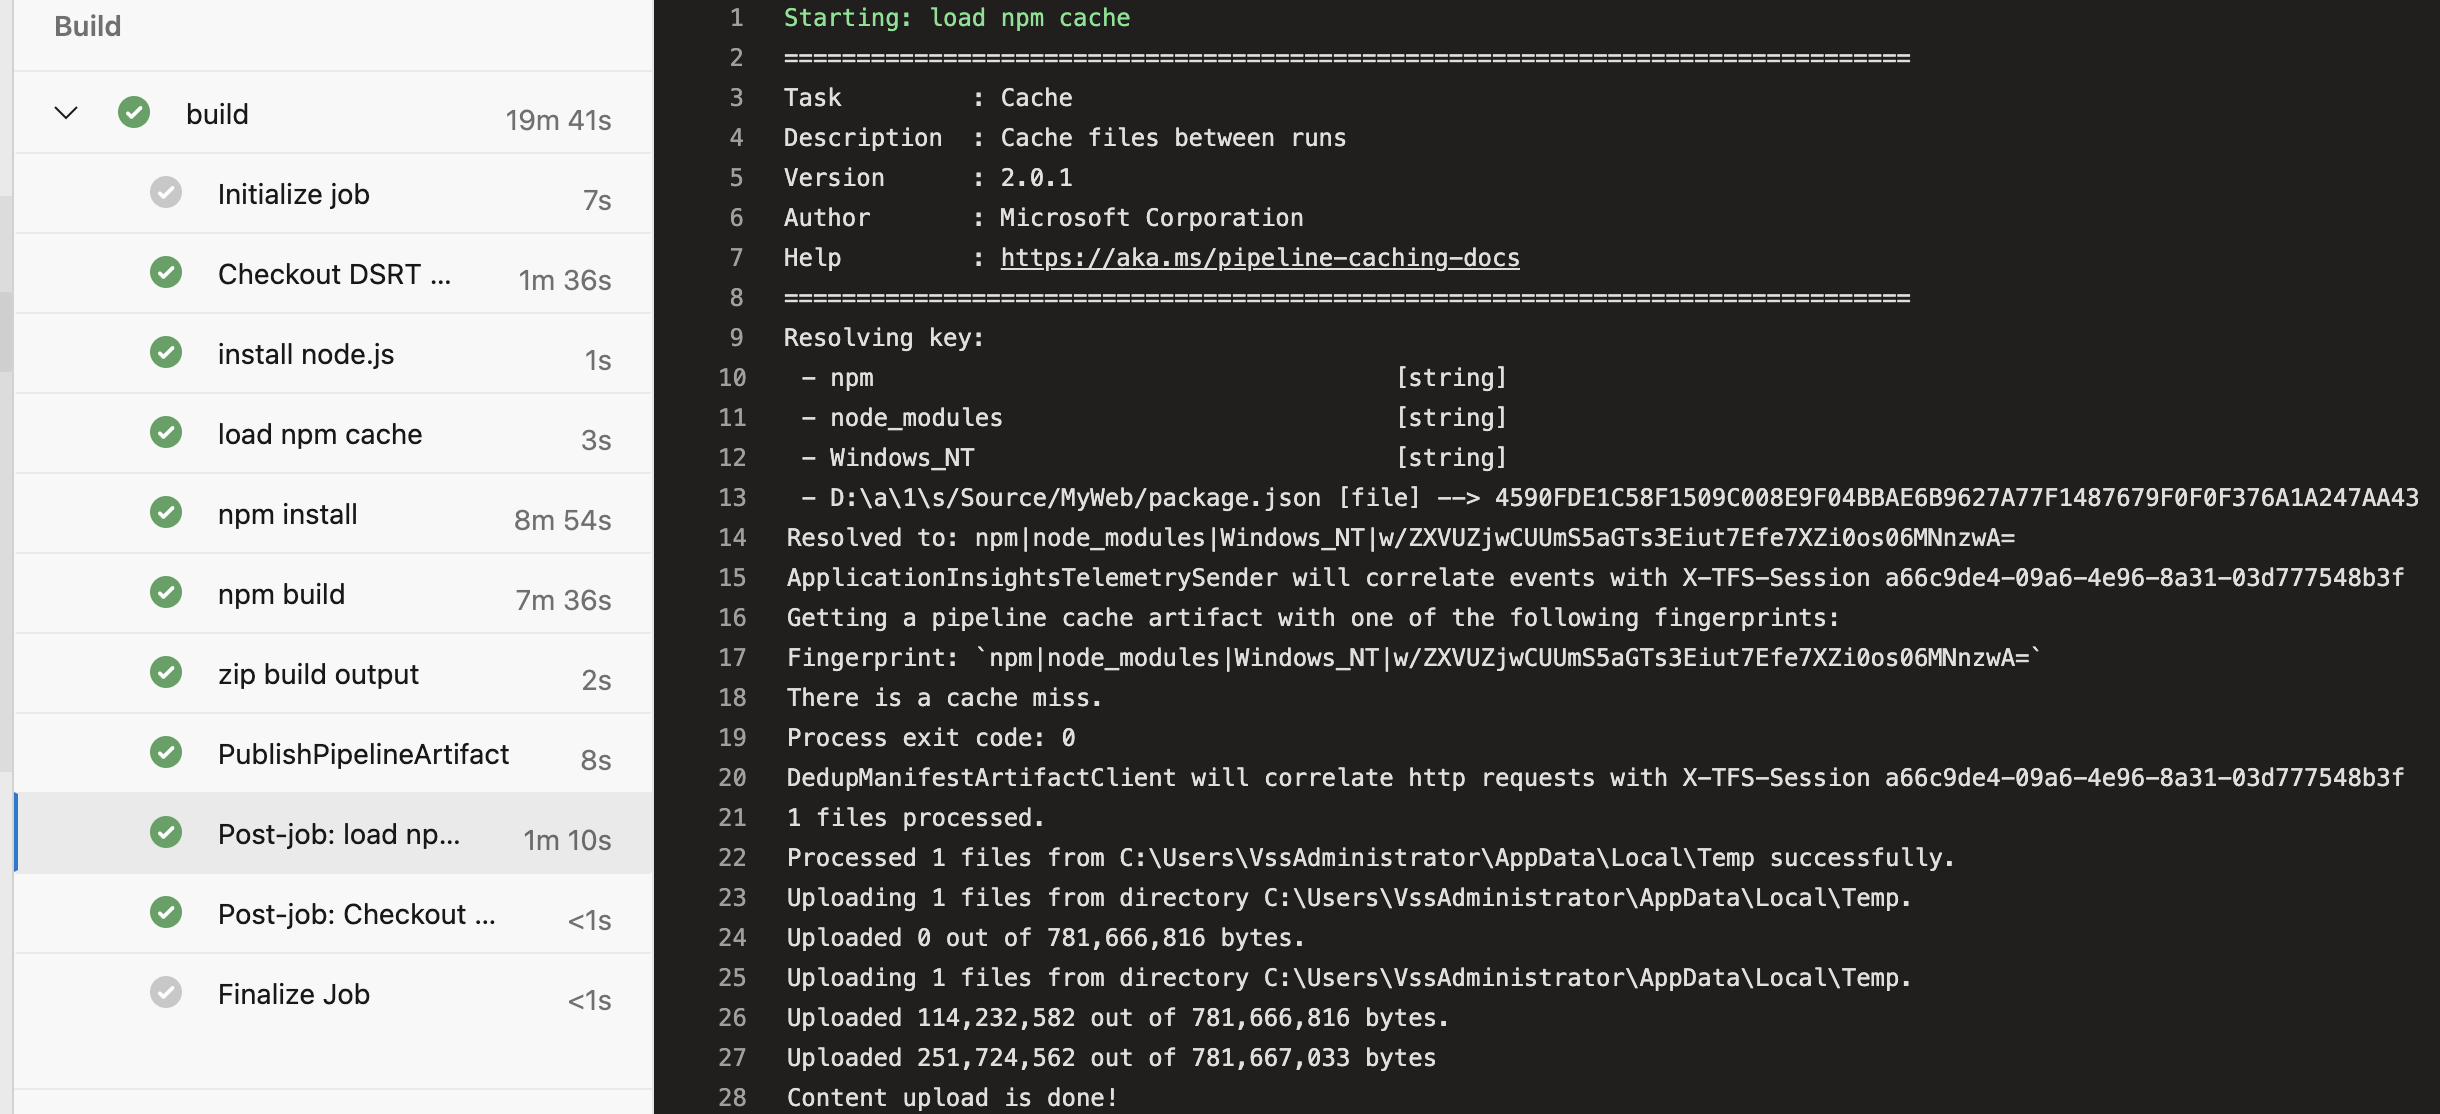 Uploading of the cache as a post-job step
How To - Just the YAML
Putting it all together, here’s what my task looks like:
1
2
3
4
5
6
7
8
- task: Cache@2
  displayName: load npm cache
  inputs:
    key: npm | $(Agent.OS) | $(Build.SourcesDirectory)/Source/MyWeb/package.json
    restoreKeys: |
        npm | "$(Agent.OS)"
    path: $(Build.SourcesDirectory)/Source/MyWeb/node_modules
    cacheHitVar: CACHE_HIT
- Note: You’ll notice my example is using
package.jsonand notpackage-lock.json- the team I was working with wasn’t using thepackage-lock.jsonfile, so I just wanted to illustrate that you can also use thepackage.jsonas a key and it will work just as well - Note: The
cacheHitVarset toCACHE_HITwill evaluate totrueif the cache hit is a success - could be useful for a conditional task where maybe you don’t even run thenpm installcommand at all
Gotchas
- There’s no way to delete a cache once it’s stored in the pipeline - you can simply change the
key:property by adding another string literal - see the below example:1 2 3 4
# from: key: npm | $(Agent.OS) | $(Build.SourcesDirectory)/Source/MyWeb/package.json # to: key: npm | node_modules | $(Agent.OS) | $(Build.SourcesDirectory)/Source/MyWeb/package.json
- Branches - the caches are isolated between branches - meaning that if I create a feature branch off main, I won’t be able to use main’s cache - more info on this here
- Pull request runs do not write cache to the source or target branch, only the intermediate branch such as
refs/pull/1/merge- more info on this here - Expiration - the cache expires after 7 days of no activity (hint - create a scheduled build if you want to ensure that a poor soul doesn’t have to experience a 20 minute build on Monday morning)
I also like this Medium post from Dev Shah for additional gotchas.
Summary
Before working with us, the team’s build averaged 30 minutes. Using a slimmed down build job and running using hosted agents brought us from 30 minutes to 20 minutes.
Since we have added and properly configured the Pipeline Cache task in our Angular CI build, we have shaved off 10 minutes from each build. When our npm build alone takes 10 minutes, our average build time of 20 minutes has been reduced by 50% to 10 minutes: 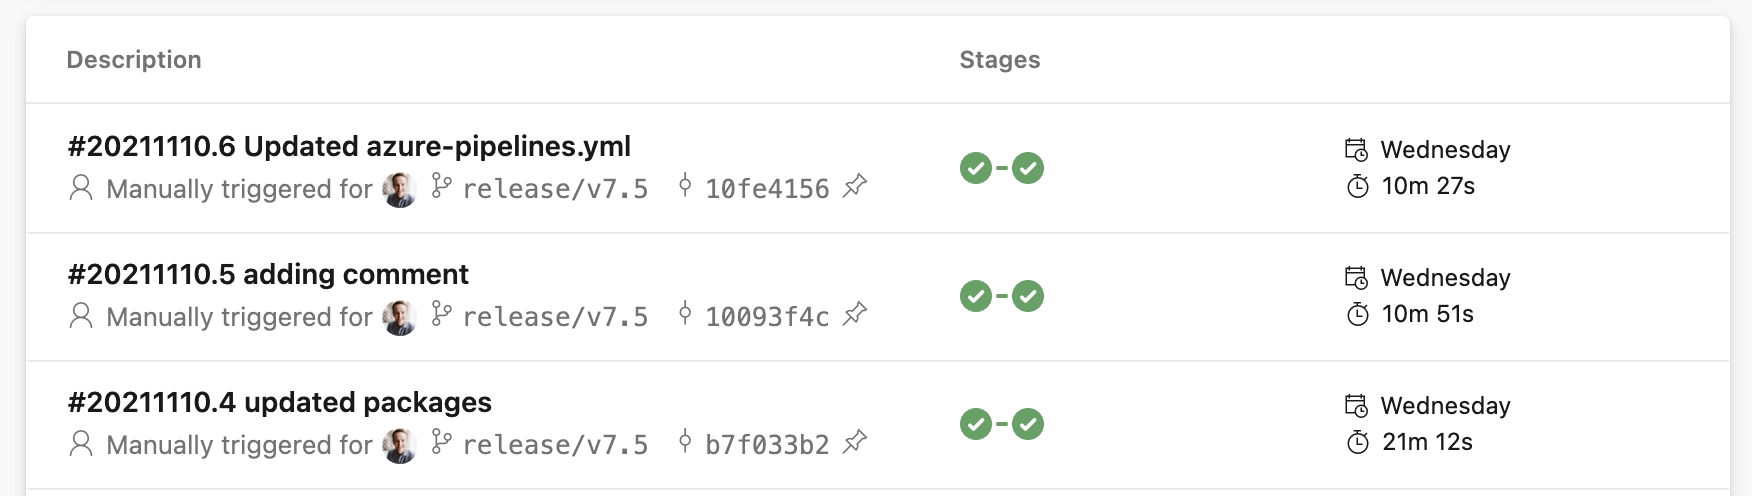 Average build time of 20 minutes shaved down to 10 minutes after adding the Cache task
This was a huge win for the us and dev team, and I’m happy to say the third time’s the charm for me on trying to configure the Azure DevOps Pipeline Caching Task.