Configure actions-runner-controller without cert-manager
Configure actions-runner-controller without cert-manager so that you can use self-signed or self-managed certificates to scale your GitHub runners
Overview
This legacy version of Actions Runner Controller is no longer supported by GitHub. You should switch to the Autoscaling Runner Sets version of ARC. This post is left here for historical purposes only.
Actions Runner Controller is a great way to set up self-scaling GitHub runners in a Kubernetes cluster. This allows teams to scale up their self-hosted runners as more jobs are queued throughout the day and scale down at night when there are fewer jobs running. There is a lot of documentation to digest in the repository, but for the most part, it’s relatively easy to get started with some basic scaling. The only prerequisite (other than having access to the Kubernetes cluster and administrative access to GitHub repo or organization) is cert-manager.
However, sometimes organizations have their own certificate requirements, and prefer to manage their own certificates vs. letting a tool like cert-manager manage them. This is where the current documentation is lacking and unclear. Other people have asked the same question, as well as my most recent customer, and we were able to figure it out so I’ll document it here!
Configuring without cert-manager
I’m going to be creating self-signed certificates, but you could imagine this working with certificates provided to you from the security team. If creating your own certificates, you will need openssl installed and callable via the command line.
1. Create RSA keys for CA cert and Server cert - this will output ca.key and server.key
1
2
openssl genrsa -out ca.key 4096
openssl genrsa -out server.key 4096
2. Create a CA configuration file (ca.conf) - the basicConstraints and keyUsage sections are required in order for the CA to be able to sign certificates
1
2
3
4
5
6
7
8
9
10
11
12
basicConstraints = CA:TRUE
keyUsage = cRLSign, keyCertSign
[req]
distinguished_name = req_distinguished_name
prompt = no
[req_distinguished_name]
C = US
ST = SomeState
L = SomeCity
O = SomeOrg
emailAddress = your@email.com
CN = actionrunners.yourorg.com
3. Create the CA certificate with the ca.conf file - this will output ca.crt
1
openssl req -x509 -new -sha512 -nodes -key ./ca.key -days 7307 -out ./ca.crt -config ./ca.conf
4. Optionally validate that the CA certificate created successfully
1
openssl x509 -noout -text -in ./ca.crt
5. Create your Server certificate config file - ie server.conf
- All 3 SANs (
alt_names) are needed - For the 3rd
alt_name, theactions-runner-systemis the namespace - if you are installing into a different namespace, replaceactions-runner-systemwith the namespace you are installing to (ie:default)
1
2
3
4
5
6
7
8
9
10
11
12
13
14
15
16
17
18
19
20
21
22
[req]
default_bits = 4096
prompt = no
default_md = sha256
x509_extensions = v3_req
distinguished_name = dn

[dn]
C = US
ST = SomeState
L = SomeCity
O = SomeOrg
emailAddress = your@email.com
CN = actionrunners.yourorg.com

[v3_req]
subjectAltName = @alt_names

[alt_names]
DNS.1 = webhook-service.actions-runner-system.svc
DNS.2 = webhook-service.actions-runner-system.svc.cluster.local
DNS.3 = actions-runner-controller-webhook.actions-runner-system.svc
6. Create the server Certificate Signing Request (csr) - this will outut server.csr
1
openssl req -new -key ./server.key -out ./server.csr -config ./server.conf
7. Create your Server certificate - this will output server.crt
1
2
3
openssl x509 -req -in ./server.csr -CA ./ca.crt -CAkey ./ca.key \
  -CAcreateserial -out ./server.crt -days 10000 \
  -extensions v3_req -extfile ./server.conf
8. Optionally inspect your Server cert to make sure it has the Subject Alternate Names (SANs, aka the alt_names from step #5)
1
openssl x509 -noout -text -in ./server.crt
9. Base64 the CA cert and copy to clipboard (pbcopy is a macOS command, if running elsewhere just echo $CA_BUNDLE and copy)
1
2
CA_BUNDLE=$(cat ca.crt | base64)
echo $CA_BUNDLE | pbcopy
10. Set the admissionWebHooks.caBundle value in the values.yaml file to the base64 value of the CA cert - you may have to remove the extra {} under admissionWebHooks
1
2
3
admissionWebHooks:
  # {} # need to remove this
  caBundle: "Ci0tL..."
11. In the values.yaml file, ensure certManagerEnabled is set to false
1
certManagerEnabled: false
12. Create your certificate secrets using kubectl - both of these are needed
1
2
3
4
kubectl create secret tls webhook-server-cert -n actions-runner-system \
  --cert=./server.crt  --key=./server.key
kubectl create secret tls actions-runner-controller-serving-cert -n actions-runner-system \
  --cert=./server.crt  --key=./server.key
13. Run the helm upgrade command to install the controller
1
2
3
helm upgrade --install --namespace actions-runner-system --create-namespace \
  --wait actions-runner-controller actions-runner-controller/actions-runner-controller \
  --values ./values.yaml
Note: Make sure to you have ran the helm repo add command already
14. Ensure that your actions-runner-controller pod in the actions-runner-system namespace has started - if it fails, describe the pod and check the events
15. Deploy your runner configuration - my example with org runners and metric-based scaling
1
kubectl apply -f runner.yaml --namespace default
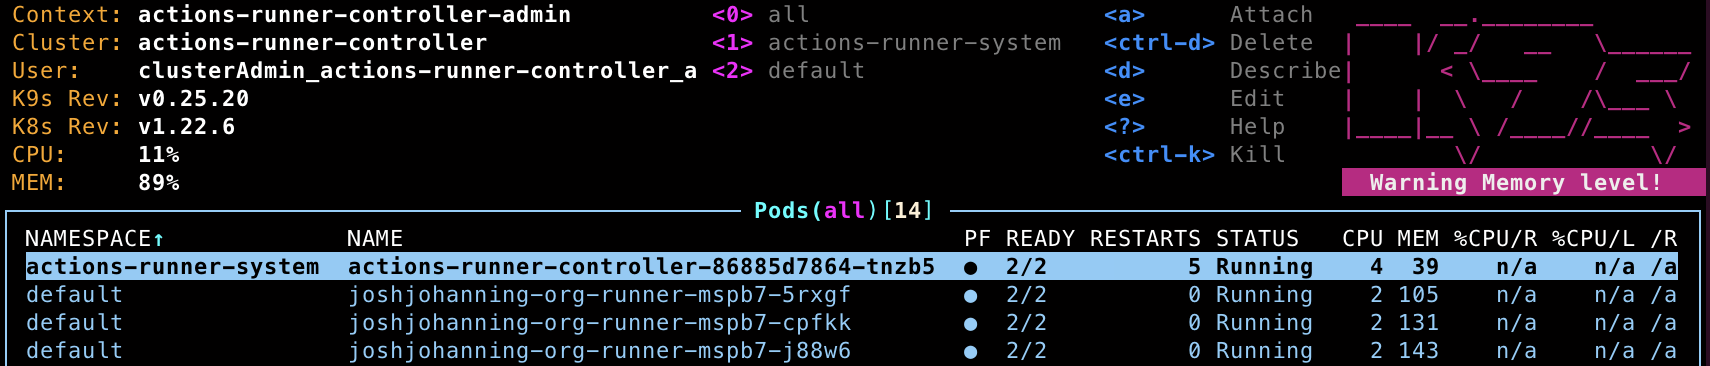
16. Ensure that your runner pods have started (describe them if not); check GitHub to see if your runner(s) show there also
Here’s me running k9s to visualize the pods and ensure they are running: The controller running in the actions-runner-system namespace; the runner pods running in the default namespace
Corresponding runners show up as org runners in GitHub: 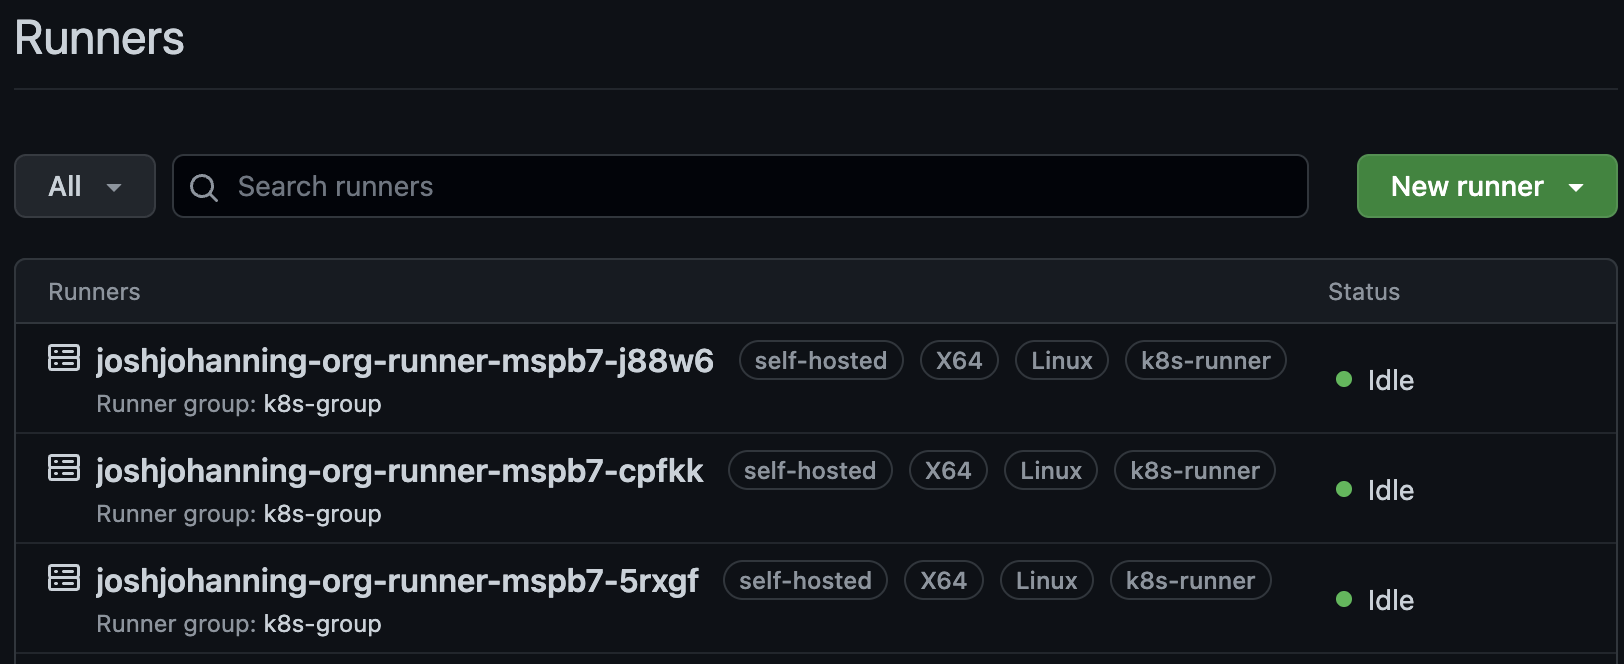 Runners with the same name as the pod name show up as org runners in GitHub
Summary
actions-runner-controller is great, but sometimes you need some good trial-and-error to do things off the beaten path. Luckily, we were able to figure out how to configure the controller without using cert-manager by interpreting the errors we saw when describing the failing pods.
As an enhancement, I could see you wanting a separate certificate for the actions-runner-controller-serving-cert and webhook-server-cert in step #12 - but I’ll leave further certificate optimizations to the certificate pros.
Feel free to ask any questions or share any enhancements!